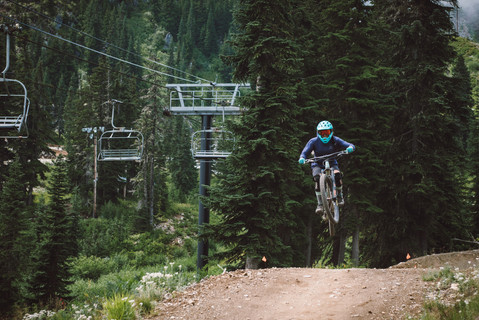
Whether you’re new to mountain biking or a veteran, SheJumps is here to help prepare you for your next ride. Mountain biking adventures are fun, but can also bring unexpected plans into the journey. Being prepared for your ride takes some of the guesswork out of the equation. SheJumps Boise Regional Coordinators, Stacey and Kim, walk through a pre-ride checklist and what to pack for a mountain biking day trip.
Micro Ventures is a free digital program to engage all ages in outdoor-related activities. Stay tuned for a different "Micro Venture" each week this summer.
Photos by Ryan French
Know your A.B.C.’s
Before leaving the house, make sure to inspect the bike. Here’s when knowing the alphabet will help you remember what things to check.

Air. Check the air pressure in your tires or the PSI (pounds per square inch) recommendation on the side of your tire and adjust based on where you’ll be riding. Check out how to find the perfect tire pressure for your mountain bike here.
Brakes. Check the front and rear stopping power, brake levers are tight (no less than a thumb’s width from handlebars). Brake pads wear down over time and can slow your stopping response. You may need to bleed your brakes or reposition your brake pads.
Chain. Test to see if the chain is squeaky or loose. Also, the chain should be clean of debris, lubed, and the measure is right. A worn chain can cause damage to the drivetrain of your bike. Measure your chain often and replace your chain as needed. Lift up the back wheel and rotate the pedals to check. Make sure all of your quick release levers are closed tightly.
Wheels. It’s a good habit to check and make sure that your wheels are on properly before you ride! You can hold your bike sideways and try wiggling your wheel side to side, perpendicular to your frame to see if there is give or if your wheel isn’t securely on. If needed, you can adjust your hub axle to be tighter if it is loose or if it wasn’t inserted properly.
Check yourself!
It’s important to be mindful of anything on you or your bike or body that could snag a tree branch or get caught in the bike.
Is my helmet on and fit correctly?
Are my shoes tied?
Loose clothing?
What to pack
Packing for your ride depends on weather, the trail, and many other factors. Keep a short list or a dedicated bag or box of things to pack every time. The more prepared you are and easy to find, the faster you can be out of the house and on the trail.

What to wear
Helmet
Gloves
Eye protection
Sun protection
Closed toe shoes
Elbow and knee pads
Gear list
Extra tube
Tire tool
Multi tool
Pump or C02 cartridge
Puncture tool
Hydration
Snacks
Navigation
First aid supplies
Layers
Mountain biking trail etiquette
As a mountain biker, you're most likely sharing the trails with others on foot. Knowing the trail etiquette helps keeps everyone moving and happy on the trail.
Mountain bikes yield to all other trail users, including hikers, horses, and dogs.
A mountain biker riding downhill yields to the uphill rider.
When passing from behind, be sure to slow down, give advanced warning/wait until the person you are passing acknowledges you and lets you pass.
When you encounter another trail user head on, slow down, come to a stop and let the person pass you safely before you continue.
Follow the 10 essentials and leave no trace.
Learn more about MTB trail etiquette with this video.
Mountain biking advice for girls
Before you go, check in with your crew with reminders on making your ride easy and fun. Don't forget:
It’s okay to walk.
Braking reminder: "Get to know your brakes" practice before you head out on the ride to get comfortable (and remember) using brakes to slow them down. It’s important to be light on your brakes, so you don’t lock up your tires, also known as “Fairy Fluff braking.”
Gear reminder: In addition, do a quick "get to know your gears" demo before you head out on the trail. It could be as simple as riding around shifting through each gear so they know what is harder and what is easier.
Track your ride
Don’t forget to start your Strava and join our SheJumps Strava Club if you haven’t already!
SheJumps values providing low-to-no cost opportunities for our members. In the current state of the world, our ability to continue providing these programs relies on the availability of limited resources. If you find this education valuable, please consider a donation to support the future of our programs. Contribute to SheJumps ⟶


Comments